Digital cyanotype printing,
from satellite to paper.
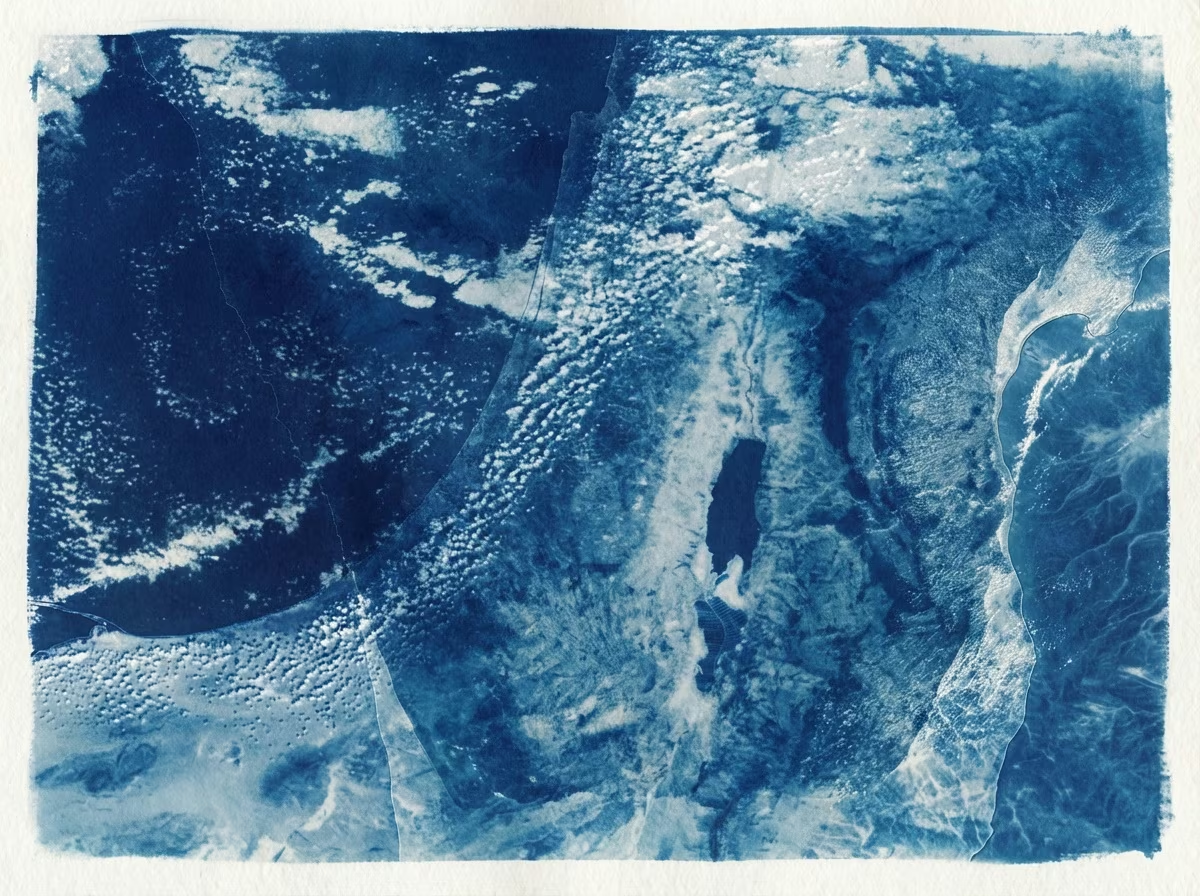
Cyanotype printing is one of the oldest photographic processes — a cameraless image, exposed in sunlight, washed in water, and finished in a deep, characteristic blue. This guide walks through a modern take on it: making a digital cyanotype from NASA Worldview satellite imagery, then layering it into a finished piece you can print at home or order as a fine-art print.

What is a digital cyanotype?
A traditional cyanotype is made by coating paper with an iron-salt solution, laying objects or a negative on top, and exposing it to UV light. A digital cyanotype follows the same visual language — the same Prussian blues, the same soft midtones — but the source image is composed on screen instead of in a darkroom. That lets the image come from anywhere: a photograph, a botanical scan, or — in our case — a satellite portrait of Earth on a specific day.
Once the composite is final, it is printed as a fine-art inkjet print rendered in cyanotype tones — the method that powers every Now Here Art Labs piece. This guide walks through that digital workflow from start to finish.
What you'll need
- A meaningful place and date (or up to three of each).
- Access to NASA Worldview — free, public satellite imagery from MODIS and VIIRS.
- An image editor that supports layers and blend modes (Photoshop, Affinity, or any free equivalent).
- A cyanotype tone curve or LUT (or our studio tool, which applies one automatically).
- For printing: a photo inkjet printer and archival fine-art paper, or a fine-art print partner.
Step 1 — Pick a place and a date
Every cyanotype begins as a decision. A childhood home, a wedding day, the morning of a storm. The strongest pieces start with one specific coordinate and one specific date — the more particular, the better the image carries meaning.
Step 2 — Pull the satellite frame
Open NASA Worldview, search the location, and set the date. Pick the layer that best fits the look you want: the Corrected Reflectance (True Color) layer is the most recognizable, while VIIRS tends to render cloud detail more softly. Zoom until the frame holds the right mix of land, water, and weather, then export the image at the highest resolution available.
Step 3 — Layer your moments
In your editor, stack each satellite frame as its own layer. Set the upper layers to Multiply or Darken at 40–70% opacity so the lower frame still reads through. Where two dates overlap, the image of the final cyanotype will hold the weight of both — that intersection is the whole point of the piece.
Step 4 — Convert to cyanotype tones
Desaturate the composite, then push the highlights toward warm paper-white and the shadows toward Prussian blue (roughly hex #0b3d91). A curves adjustment that lifts the midtones gives the image the characteristic glow of a classic cyanotype print. If you're working in our studio tool, this conversion happens automatically with a calibrated cyanotype LUT.
Step 5 — Add a soft edge
Classic cyanotypes have a soft, irregular edge. Apply a soft-edge mask around the composite so the print reads as a physical object, not a screenshot. Soft, irregular edges sell the illusion better than a hard rectangle.
Step 6 — Print it
For most people, the simplest route is a giclée inkjet print on archival fine-art paper — a smooth, matte 200 gsm stock holds the cyanotype tones beautifully. Print at 300 DPI in a 16-bit color profile so the midtones stay smooth. If you'd rather skip the printer entirely, our studio has every piece printed by Gelato on archival 200 gsm enhanced-matte fine-art (giclée) paper and shipped to your door.
Tips for a stronger print
- Pick contrasting weather. A clear day layered against a stormy one reads more emotionally than two clear days.
- Resist over-layering. Two or three frames is almost always enough; beyond that the image turns to mud.
- Watch the highlights. Cyanotype paper-white is warm, not pure white — let it breathe.
- Print a small proof first. A small test print before a large one will save you both paper and grief.
Or let the studio do it for you.
The Now Here Art Labs studio tool runs every step in this guide automatically — search a place, pick up to three dates, choose indigo or sepia, and order an archival fine-art print shipped to your door.
Enter the studioFrequently asked questions
Is a digital cyanotype a "real" cyanotype?
The tones, composition, and feel are faithful to the historical process — the same Prussian blues and soft midtones, composed on screen and printed on archival fine-art paper instead of sensitized in a darkroom.
Can I use my own photographs instead of satellite imagery?
Absolutely. The same layering and tone-curve steps work for any high-resolution source — film scans, drone footage, or scanned botanicals.
What paper holds the cyanotype look best?
A smooth, matte archival fine-art paper around 200 gsm. It keeps the deep indigo shadows rich and lets the warm paper-white highlights breathe — the same stock our studio prints on.